下面是MongoDB Database Tools安裝的Path。
1. 啟動 MongoDB 服務
- 在命令提示字元或 PowerShell 中執行
mongod 來啟動 MongoDB 服務。
2. 連接到 MongoDB Shell
- 在另一個命令提示字元或 PowerShell 中執行
mongo 來連接到 MongoDB 的交互式 Shell。
3. 創建一個新的資料庫
- 使用
use 命令來創建一個新的資料庫。例如,要創建一個名為 my_database 的資料庫,可以執行以下命令: use my_database
如果這個資料庫不存在,MongoDB 將會創建一個新的資料庫。注意,如果這個資料庫沒有任何集合,它將不會在資料庫列表中顯示。
4. 創建一個新的集合
5. 驗證創建是否成功
user.js
const mongoose = require('mongoose');
// 定義模型 Schema
const Schema = mongoose.Schema;
const userSchema = new Schema({
username: String,
email: String,
age: Number
}, { collection: 'my_custom_users' }); // 在這裡指定集合名稱為 my_custom_users collection;
// 創建 User 模型
const User = mongoose.model('User', userSchema);
/*創建 User 模型:透過 mongoose.model('User', userSchema) 來創建名為 User 的 Mongoose 模型。
使用 mongoose.model 方法將定義的模式 userSchema 轉換為模型 User */
module.exports = User;
/*匯出模型:module.exports = User;
將創建的 User 模型透過 module.exports 導出,使其可以在其他文件中引入和使用。 */
預設情況下,MongoDB 服務通常運行在 localhost 的 27017 端口上。
這是 MongoDB 的默認主機和端口配置,
可以使用 mongodb://localhost:27017/ 來連接至本地運行的 MongoDB 服務。
mongoose.connect 函數中的連接字串 mongodb://localhost:27017/my_database 表示連接至本機上運行的 MongoDB 服務,並指定使用 my_database 這個資料庫。
在server裡面,以下兩行要記得加上。
app.use(express.urlencoded({ extended: true })); // 處理 URL 編碼的資料
app.use(express.json()); //這個必須存在
根據💓Ajax-在node.js使用fetch時,常會碰到之問題"req.body返回值為空"詳解,並附上簡單實作練習的經驗。
本例的API設定如下,可以看出有滿足RESTful API的條件。
GET /users:用於獲取所有用戶。
GET /users/:id:用於獲取特定 ID 的用戶。
POST /users:用於創建新用戶。
PUT /users/:id:用於更新特定 ID 的用戶。
DELETE /users/:id:用於刪除特定 ID 的用戶。
app.js
const express = require('express');
const app = express();
const mongoose = require('mongoose');
const User = require('./models/user'); // 假設已經建立了User模型
// 連接至 MongoDB
mongoose.connect('mongodb://localhost:27017/my_database')
.then(() => {
console.log('成功連接至 MongoDB');
})
.catch((err) => {
console.error('連接失敗:', err);
});
// 設置靜態資源目錄(假設HTML檔案存放在 public 目錄下)
app.use(express.static('.'));
app.use(express.urlencoded({ extended: true })); // 處理 URL 編碼的資料
app.use(express.json()); //這個必須存在
//Put更新用戶
app.put('/users/:id', async function (req, res) {
await User.findOneAndUpdate(
{
"_id": req.params.id, //req.params.id 的值,因為它是在路由中 :id 的位置提供的值。
}, // 條件,選擇要更新的文檔
{ $set: {
"username": req.body.username2v,
"age": req.body.age2v, // 更新年齡
"email": req.body.email2v // 更新email
}},
{ new: true } // 選項,返回更新後的文檔
)
.then(updatedUser => {
// ...處理更新後的用戶
console.log('更新後的用戶:', updatedUser);
res.status(201).json(updatedUser);
})
.catch(error => {
console.error('更新用戶時出錯:', error);
res.status(500).json({ message: "qqq put更新 ID出錯ㄌ" ,id: req.params.id});
});
})
//Get全部用戶
app.get('/users', async function (req, res) {
await User.find({})
.then(FindUser => {
console.log('用戶列表:', FindUser);
res.status(201).json(FindUser);
})
.catch (error => {
console.error('更新用戶時出錯:', error);
res.status(500).json({ message: "qqq Get全部 出錯了" });
})
})
//Get個別別用戶
app.get('/users/:id', async function (req, res) {
await User.find({"_id": req.params.id})
.then(FindUser => {
console.log('用戶:', FindUser);
res.status(201).json(FindUser);
})
.catch (error => {
console.error('更新用戶時出錯:', error);
res.status(500).json({ message: "qqq Get個別 沒有這個用戶" });
})
})
//Post新增用戶, POST請求的路由處理
app.post('/users', async (req, res) => {
var newUser = {
username: req.body.username,
email: req.body.email,
age: req.body.age,}
console.log("newUser",newUser);
await User.create(newUser)
.then(createdUser => {
console.log(createdUser);
res.status(201).json(createdUser); // 返回從資料庫返回的新建用戶資料
})
.catch (error => {
res.status(500).json({ message: "qqq POST 錯誤" });
})
});
//delete刪除用戶
app.delete('/users/:id', async (req, res) => {
await User.deleteOne({ _id: req.params.id })
.then(delete_user => {
console.log("delete: "+JSON.stringify(delete_user),"delete_ID: "+req.params.id);
res.status(201).json(delete_user); // 返回從資料庫返回的新建用戶資料
})
.catch (error => {
res.status(500).json({ message: "Delete qqq 沒有這個ID啦" });
})
});
// 監聽端口
const PORT = process.env.PORT || 3001;
app.listen(PORT, () => {
console.log(`Express 伺服器已啟動,監聽在端口 ${PORT}`);
});
index.html
<!DOCTYPE html>
<html lang="en">
<head>
<meta charset="UTF-8">
<title>User Information</title>
</head>
<body>
<h1>User Information Form</h1>
<h3>Adding User</h3>
<form id="userForm">
<label for="username">Username:</label>
<input type="text" id="username" name="username" placeholder="Enter username"><br><br>
<label for="email">Email:</label>
<input type="email" id="email" name="email" placeholder="Enter email"><br><br>
<label for="age">Age:</label>
<input type="number" id="age" name="age" placeholder="Enter age"><br><br>
<input type="submit" value="Submit">
</form>
<form id="Updating_form">
<h3>Updating User</h3>
<input type="text" id="userid2" name="userid2" placeholder="Enter userid2"><br><br>
<input type="text" id="username2" name="username2" placeholder="Enter username2"><br><br>
<input type="email" id="email2" name="email2" placeholder="Enter email2"><br><br>
<input type="number" id="age2" name="age2" placeholder="Enter age2"><br><br>
<input type="submit" id="submit2" value="Submit2更新"><br><br>
</form>
<h3 id="error_txt">show up error</h3>
<input type="text" id="delete_id" name="delete_id" placeholder="Enter delete_id"><br><br>
<button id="delete" value="delete">delete</button> <br>
<h3 id="find_one">find_one</h3>
<input type="text" id="find_one_id" name="find_one_id" placeholder="Enter find_one_id"><br><br>
<input type="submit" id="find_one_btn" value="find_one_btn">
<h3 id="findh3">find User all</h3>
<input type="submit" id="find" value="find">
<script src="script.js"></script>
</body>
</html>
只要需要使用前端Fetch的Post和Put來傳遞json資料到Server時,
就一定需要加上
method: 'POST' or 'PUT'
headers: {
"Content-Type": "application/json",
},
body: JSON.stringify(formData)
script.js
//Post新增用戶
document.getElementById('userForm').addEventListener('submit', async function(event) {
event.preventDefault(); // 阻止表單默認提交行為
const formData = {
// 获取表单中的数据并添加到 FormData 对象中
username: document.getElementById('username').value,
email: document.getElementById('email').value,
age: document.getElementById('age').value
}
const requestOptions = {
method: 'POST',
headers: {
"Content-Type": "application/json",
},
body: JSON.stringify(formData)
};
console.log('requestOptions:',requestOptions);
console.log('formData:',formData);
await fetch('/users', requestOptions)
.then((response) => {
return response.json();
})
.then((response) => {
console.log('New user created:',response);
document.querySelector("#error_txt").textContent = JSON.stringify(response);
})
.catch((error) => {
console.log(`Error花: ${error}`);
document.querySelector("#error_txt").textContent = "Post Error花"+JSON.stringify(error);
})
}
);
//Put更新用戶
document.getElementById('submit2').addEventListener('click', async function(event) {
event.preventDefault(); // 阻止表單默認提交行為
const updateUser2 = {
//userid2v: document.getElementById('userid2').value,
username2v: document.getElementById('username2').value,
age2v: document.getElementById('age2').value,
email2v: document.getElementById('email2').value
}
const requestOptions2 = {
method: 'PUT',
headers: {
"Content-Type": "application/json",
},
body: JSON.stringify(updateUser2)
};
console.log('requestOptions2:',requestOptions2);
await fetch(`/users/${document.getElementById('userid2').value}`,requestOptions2)
.then((response) => {
return response.json();
})
.then((response) => {
console.log('New updateUser created:',response);
document.querySelector("#error_txt").textContent = JSON.stringify(response);
})
.catch((error) => {
console.log(`Error花: ${error}`);
document.querySelector("#error_txt").textContent = "Put你ID連輸入都沒輸入"+JSON.stringify(error);
})
}
);
//delete刪除用戶
document.getElementById('delete').addEventListener('click', async function() {
const deleteUserOptions = {
method: 'DELETE',
headers: {
"Content-Type": "application/json",
}
};
await fetch(`/users/${document.getElementById('delete_id').value}`,deleteUserOptions)
.then((response) => {
return response.json();
})
.then((response) => {
console.log('New delete created:',response);
document.querySelector("#error_txt").textContent = JSON.stringify(response);
})
.catch((error) => {
console.log(`Error花: ${error}`);
document.querySelector("#error_txt").textContent = "delete你ID連輸入都沒輸入"+JSON.stringify(error);
})
})
//Get全部用戶
FindUser(); //連進function
async function FindUser() {
await fetch('/users')
.then((response) => {
return response.json();
})
.then((response) => {
console.log('New Find created:',response);
document.querySelector("#findh3").textContent = JSON.stringify(response);
document.querySelector("#findh3").style.backgroundColor = "lightblue";
})
.catch((error) => {
console.log(`Error花: ${error}`);
})
}
document.getElementById('find').addEventListener('click', ()=> {
FindUser()
})
//Get個別別用戶
document.getElementById('find_one_btn').addEventListener('click', async function(event) {
await fetch(`/users/${document.getElementById('find_one_id').value}`)
.then((response) => {
return response.json();
})
.then((response) => {
console.log('New find_one created:',response);
document.querySelector("#find_one").textContent = JSON.stringify(response);
document.querySelector("#find_one").style.backgroundColor = "lightcoral";
})
.catch((error) => {
console.log(`Error花: ${error}`);
})
})
response.json() 方法用於解析從服務器返回的 JSON 響應數據,它將 JSON 格式的數據轉換為 JavaScript 物件。
.then((response) => {
return response.json();
})
當您調用 response.json() 時,它將會自動將 JSON 格式的數據解析為 JavaScript 物件。
因此,在 .then() 函數中的 response 參數已經是一個 JavaScript 物件了。
所以,在這種情況下,不需要再使用 JSON.parse(response),
因為 response 已經是解析後的 JavaScript 物件,不需要再次解析。
.then((response) => {
document.querySelector("#find_one").textContent = JSON.stringify(response);
})
<<這邊若用JSON.parse(response);會出現錯誤,因為response已經變成 JavaScript 的物件,
不是.json檔案了,所以無法解析。
JSON.stringify(response) 用於將 JavaScript 物件轉換為 JSON 格式的字符串,以便在網頁中顯示。
這個動作是將 JavaScript 物件轉換為 JSON 字符串,而不是解析 JSON 字符串成為 JavaScript 物件。
因此,response.json() 已經幫助您將服務器返回的 JSON 格式數據解析為 JavaScript 物件,
不需要再使用 JSON.parse() 方法。
而 JSON.stringify() 則是將 JavaScript 物件轉換為 JSON 字符串,用於將 JavaScript 物件在網頁中顯示為文本。
await fetch(`/users/${document.getElementById('find_one_id').value}`)
.then((response) => {
return response.json();
})
.then((response) => {
console.log('New find_one created:',response);
document.querySelector("#find_one").textContent = JSON.stringify(response);
document.querySelector("#find_one").style.backgroundColor = "lightcoral";
})
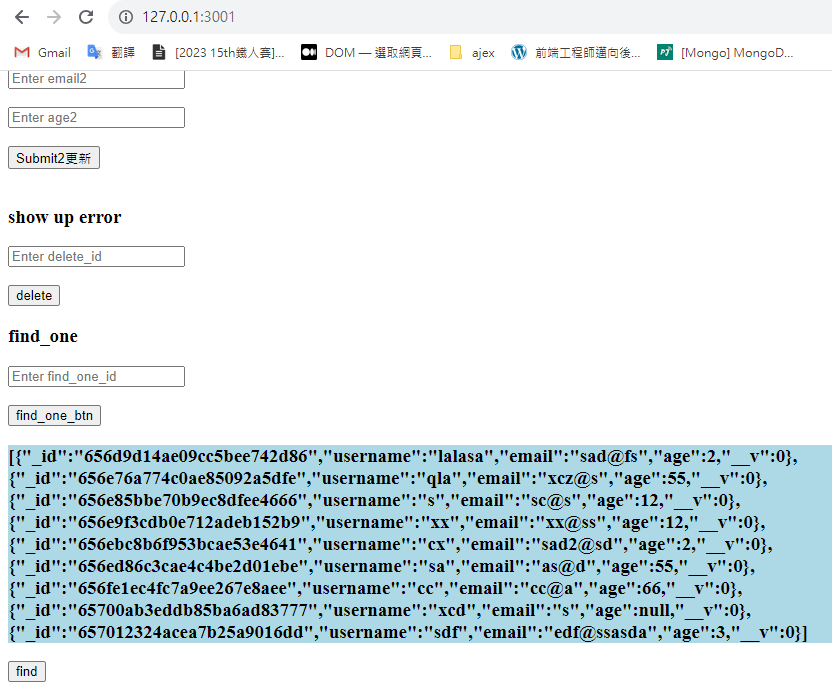
💗網頁介紹>>
一進入網頁時,會先自動進MongoDB裡Get所有的使用者,並顯示出來


沒有留言:
張貼留言
喜歡我的文章嗎? 喜歡的話可以留言回應我喔! ^^